Step-by-step guide on how to register your domain, setup a web hosting package and get your WordPress website online.
We will help you:
- Register a domain name
- Set up a web hosting account
- Set up and install WordPress
- Customising your WordPress website
- Create pages, posts and menu’s
- Installing WordPress plugins
- Configure comments and sidebars
In this guide we will help you create your first WordPress website, we will give you some advice on domain registration, help you choose and setup a hosting package, show you how to install WordPress and cover all the basics you would need to configure your WordPress, create new pages and menus and install some highly recommended plugins.
Last updated December 2016
Categories
How to
Domains
Web Hosting
WordPress
Step #1: Registering a domain name
Choosing a domain name
Your domain name should be catchy, brandable and easy to remember and ideally be your name. (For example: CompanyName.co.za if it is for your company and if it is for a personal website or blog then YourName.co.za is perfect.)
The extension part is also important, the bit after the dot, like .co.za or .com, we always recommend registering your local extension, so for South Africa it will be .co.za. If you can, also get the .com.
If your preferred domain name has already been registered, you can search for an alternative such as .agency, .capetown, .durban, .joburg, .xyz, etc. Our search will also suggest domain names to help find one that works for you.
Registering a domain name
Domain registration page
Go to our domain registration page, type your domain in the “Type your domain name here…” field, select your extension (remember we covered that above) and then click “Search”, our system will take care of the rest.
Add a web hosting package
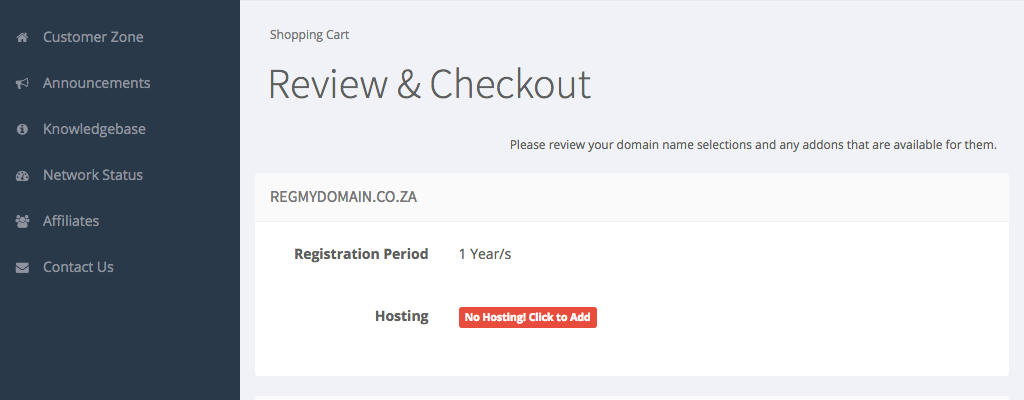
If you want to add a web hosting package to you domains, you can do so on the “Review & Checkout” page, just click the “No Hosting! Click to Add” button then choose one of our web hosting packages. If you would like WordPress pre-installed then choose “WordPress Hosting”.
Note: Choosing a web hosting package isn’t required for registering a domain.
Billing and registrant information
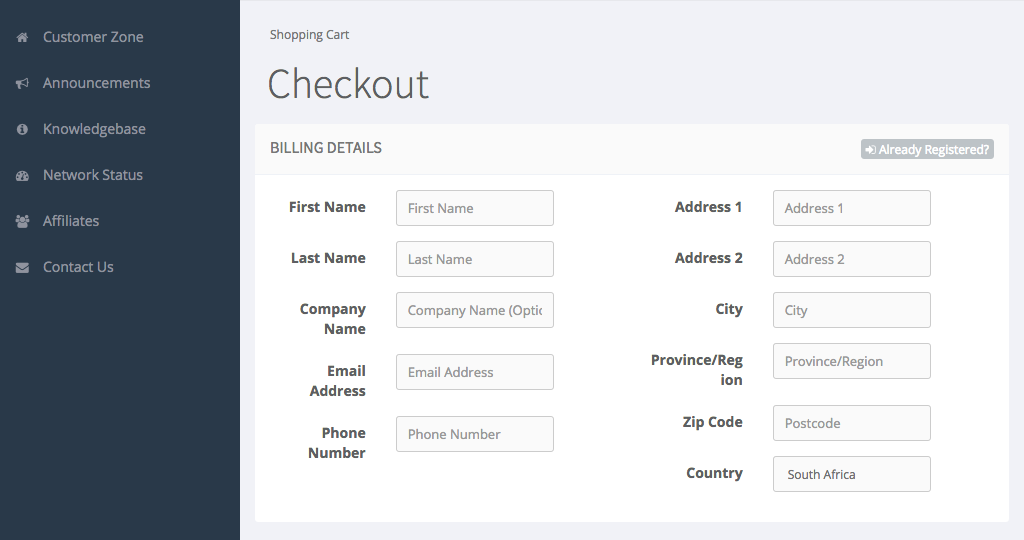
The next step will be the “Review & Secure Checkout”, where you will need to complete the billing and registrant information. The domain will be registered and secured with your details, meaning you will be in charge of your domain.
Complete your order
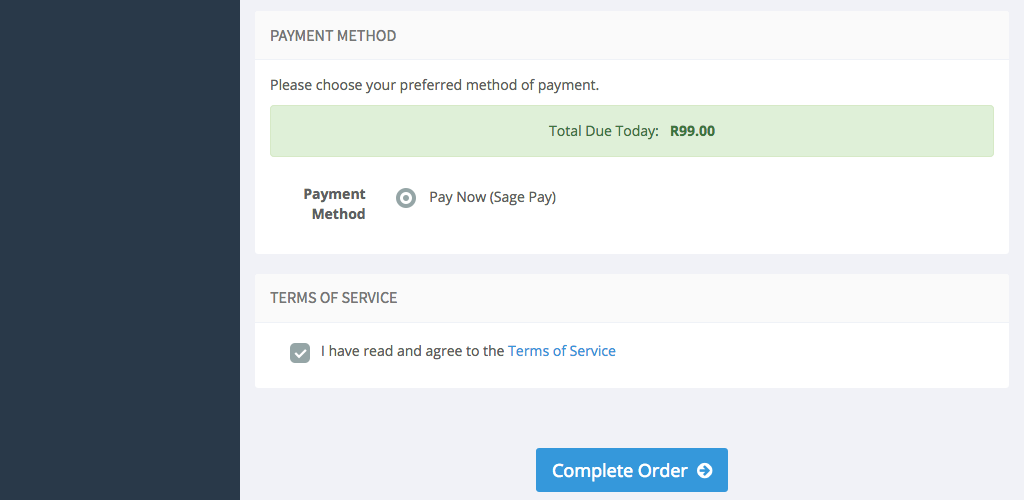
Final step will be to make payment and get your domain registered, do this by clicking on the “Complete Order” button, if anything is missing or incorrect you will get a notification. Correct the errors and try again.
Congratulations! You now have a domain name!
Step #2: Setting up a web hosting account
Choosing a web hosting package
Professional Email Hosting
This will allow you to have personalised email accounts with your domain name. (For example: yourname@yourdomain.co.za), no more unprofessional Gmail or Yahoo addresses.
Web Hosting
If you need to host a website and have personalized email accounts this is the way to go, you can use your control panel to manage every aspect of your hosting package, from creating email accounts to installing popular CMS WordPress with our one-click install.
WordPress Hosting
This package offers everything that the above two offer with an additional perk, WordPress will be pre-installed on your hosting account, so your site will be up in running in minutes and we will take care of the updates and security, so you can focus on creating your web site.
You can upgrade or downgrade your email hosting, web hosting and Worpress hosting package at any time. You can do this yourself via your control panel or call us if you require assistance.
Setting up a web hosting package
Choosing a web hosting package
Go to one of our web hosting pages, depending on what you need, see above.
Email Hosting | Web Hosting | WordPress Hosting
Adding a package to your cart
Click “Buy Now” on one of the packages, don’t worry you can easily upgrade or downgrade at any time.
Select one of the domain options
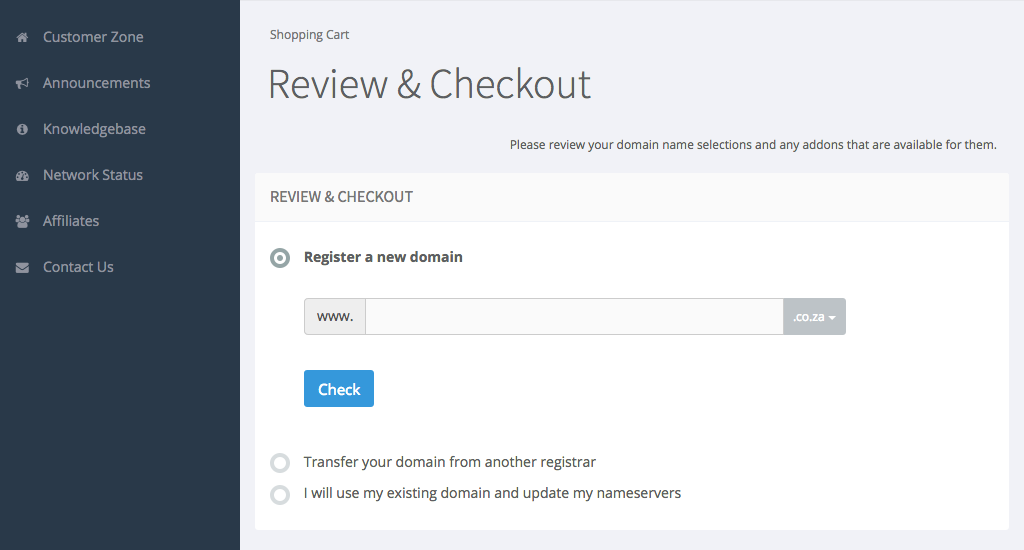
Next step requires you to choose one of three options:
Register a new domain: This is if you don’t have a domain already and would like to register one.
Transfer your domain from another registrar: This is if you already have a domain registered but would like to transfer it to us.
I will use my existing domain and update my nameservers: This is if you have a domain but would like to keep it where it is and just point it to your hosting package with us.
Review your order
Next will be the “Review & Secure Checkout”, where you will need to complete the billing information.
Complete your order
Final step will be to make payment and get your hosting package provisioned and domain registered or transferred depending on your choice, finalise your order by clicking on the “Complete Order” button, if anything is missing or incorrect you will get a notification. Correct the errors and try again.
Look at you! You have a hosting package and well on your way to getting your website online!
Step #3: Setting up WordPress and getting started
Installing WordPress
If you chose “Wordpress Hosting” in the above steps you can skip this part, WordPress has already been installed and you are well on your way!
If you chose “Web Hosting” in the above steps you can easily install WordPress by doing the following:
One-click-installation for WordPress
Accessing your client area
Log in to your MyGuru “Client Area”.
Managing your services
Click on “Active Services” and then click “Manage Product”.
Accessing cPanel
On the product details page look for the “Actions” module on the right then click “Login to cPanel”.
Softaculous Apps Installer
Scroll down to the “Software” section and click on “Softaculous Apps Installer”.
Installing WordPress
Click on the WordPress “Install” button.
Configuring your login
On the WordPress installation page only complete the “Admin Username” and “Admin Password” fields, scroll to the bottom and click “Install”.
Done, your WordPress login details will be emailed to you.
Access your WordPress dashboard
You will first need to login to your dashboard, you can do so by typing in www.yourdomain.co.za/wp-admin and using your username and password to login.
* Remember to replace yourdomain.co.za with your domain name and extension.
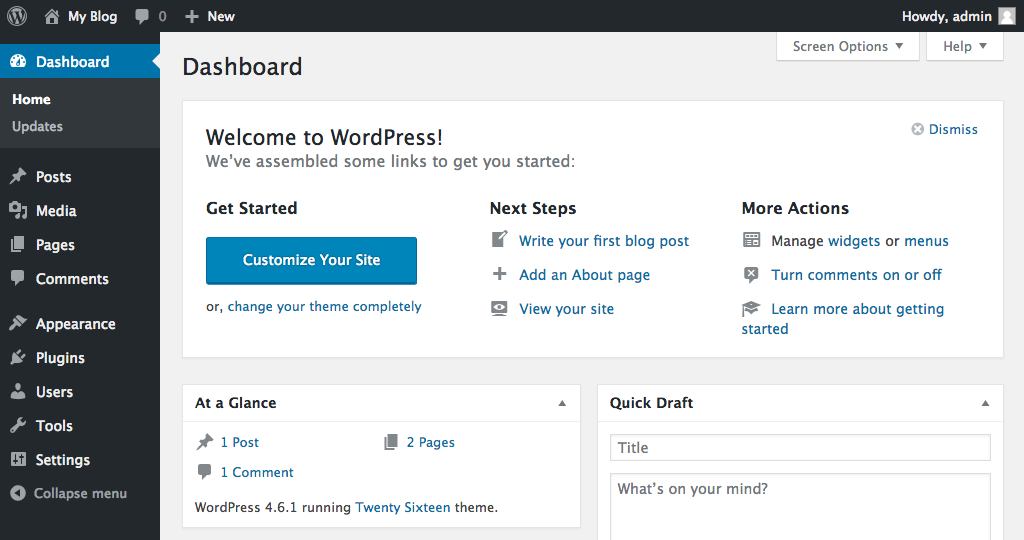
Your dashboard is labelled very clearly and should look like the below:
Setting your site title and tagline
Page title and tagline
In order to change the page title and tagline on your website, go to “Settings > General”.
Site Title: Enter the name of your site (or blog), the site title will display at the top of your browser page.
Tagline: Is a short phrase or sentence to describe what your website is about.
Click on the “Save Change” button at the bottom.
Step #4: Customising your WordPress website
Choosing a theme
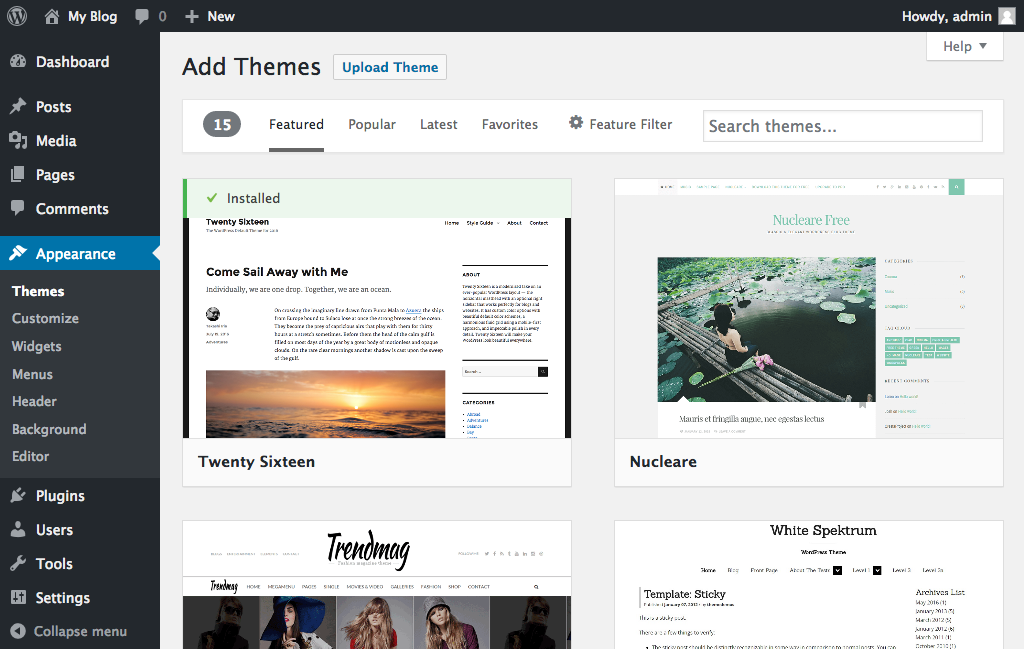
Once you have logged into your dashboard there are 1000’s of free themes to choose from. Click on “Appearance”, located on the sidebar.
When looking for a theme, don’t rush, take your time browsing the free themes. Many of the free themes are high quality and professional.
There are also premium themes you can buy, we highly recommend considering this as you will get professionally designed and secure themes this way.
Another option is to get a website professionally designed/developed for you.
Installing your theme
So you have found your perfect theme and now it is time to install it. Good news is the installation process is very simple:
Adding new themes
Click on “Appearance”, located on the sidebar, click on “Add New Theme”.
Uploading themes
If you bought a theme click on “Upload Theme” or use the “Featured / Popular / Latest” menu options to find a theme you like.
Activating your theme
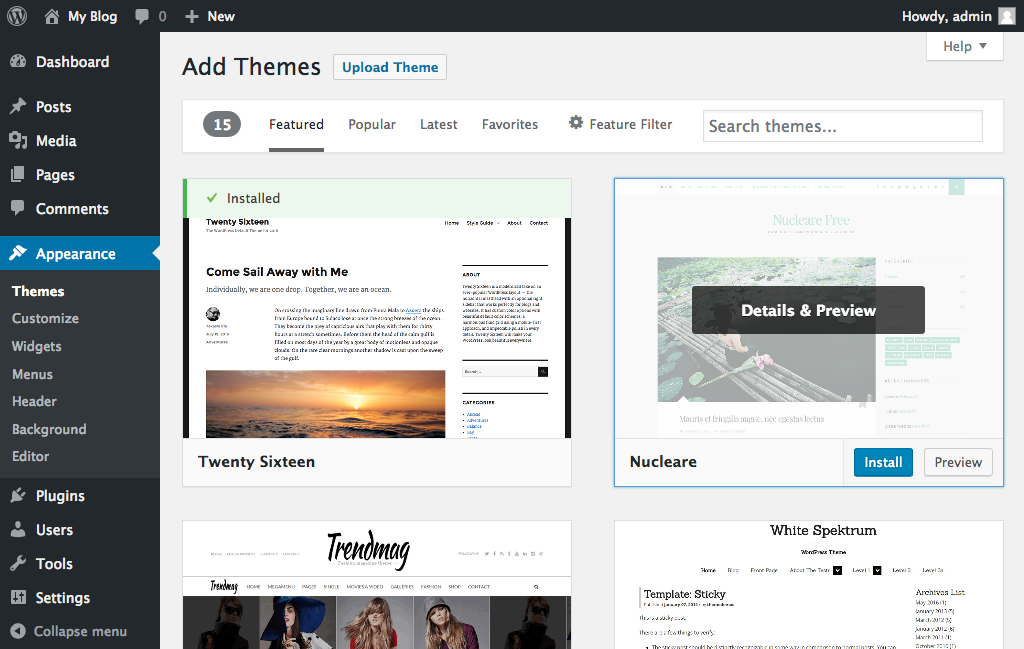
Hover your mouse over the selected theme and click on “Install” and then “Activate”. Your theme is now active and ready to work on.
Keep in mind that if you would like to change the theme for whatever reason, your pages, posts and content will not be deleted. So you will not have to worry about losing what you have created when changing themes.
Step #5: Creating pages, posts and menus
How to create new pages and add content
Now that you have installed your chosen theme, you can begin to create content for your website. We will run through the basics to get you started below:
Adding a new page
Add new page
In your WordPress dashboard, look for “Pages” which is located on the left sidebar, hover over this item and click “Add new”.
Choose a page title
On the add new page enter you page title, for example “Home” “About” “Contact” or “Blog”.
Add your content
Below the title you will see what is called the HTML WYSIWYG editor, this is where you can add your page content and images.
Publish your page
Once you have created your page, you can click on “Preview”, found on the right hand side to view your page. Once you are happy with it, click on “Publish”.
Setting up a static front page
Does your home page look like a blog post? This is an easy fix, all you need to do is change it to a static page.
Making your home page static means that this page will not look like a blog but more like a page you have designed.
Reading settings
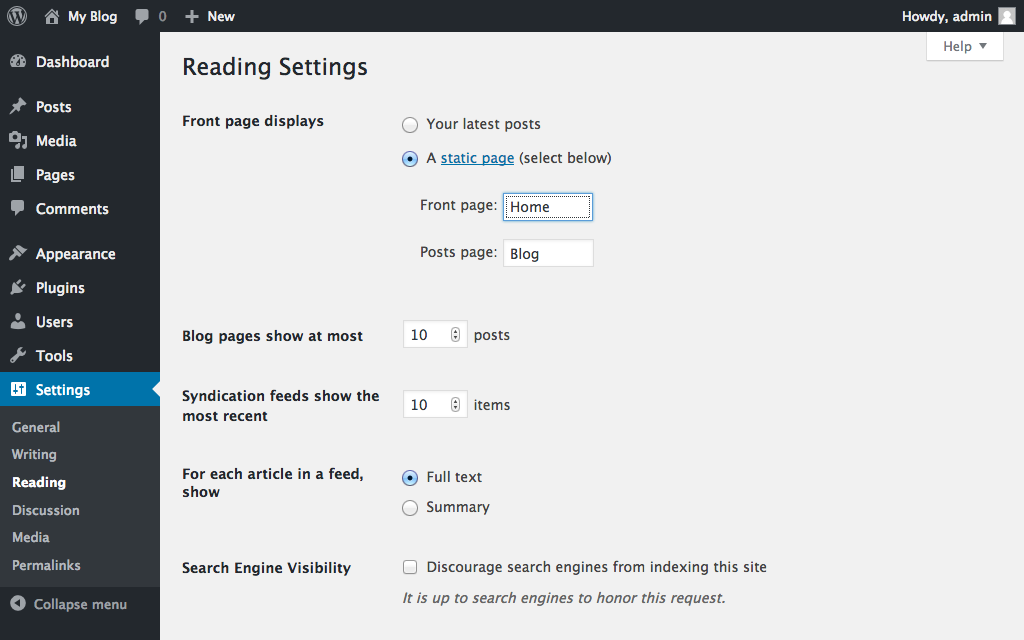
Hover over “Settings” found on the left sidebar, then click on “Reading”.
Front page displays
Under “Front page displays”, tick the field “A Static page” and then from the drop down by “Front page:”, choose the “Home” page you have created to be your static page.
Posts page (Optional)
For the “Post page:”, choose the “Blog” page you have created to be your blog page.
Click on the “Save Changes” button.
Adding your pages to a menu
Edit menus
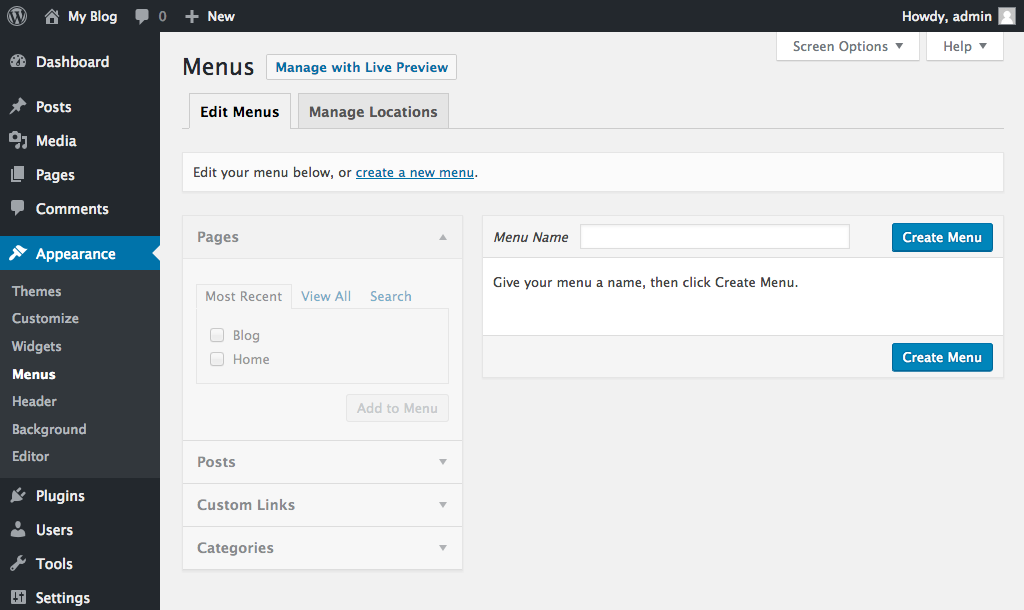
Hover over the “Appearance” menu located on the sidebar, click on “Menus”, this will bring up the menu editor.
Create a new menu
Select “Create a new menu”, enter the name of your menu in the “Menu Name” box and then click on the button “Create Menu”.
Adding pages to menu
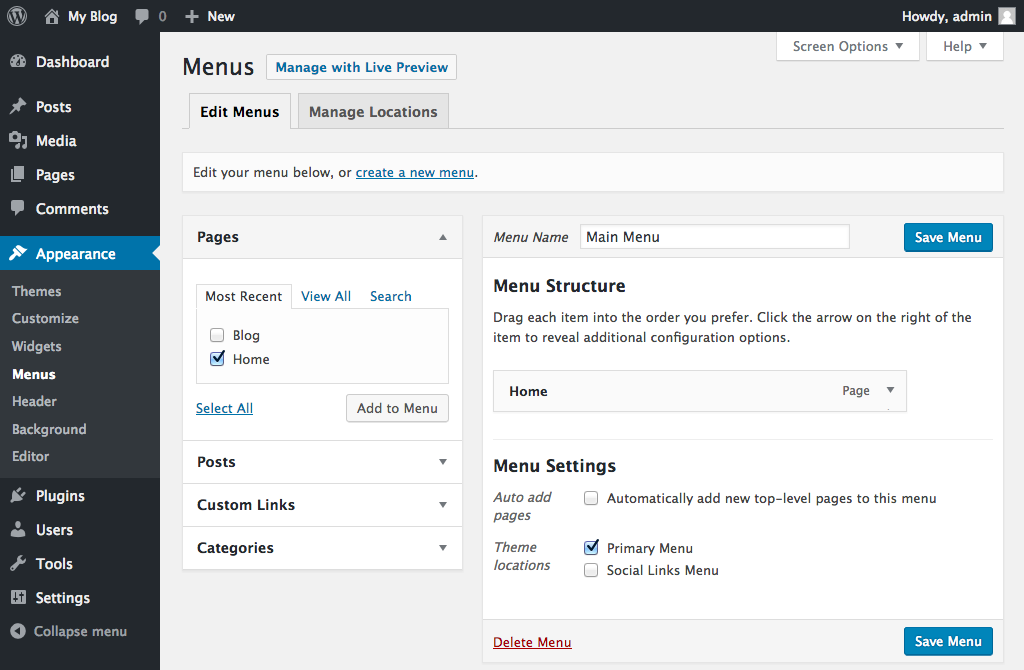
Find the page you created in the pane to the left of the menu, check the box next to it and “Add to Menu”.
Menu structure
Once you have added all the pages you would like to your menu, you can drag these to order them and then click on “Save Menu”.
Set the menu location
Below the menu structure you just created there is “Menu Settings” make sure you’ve ticked “Primary Menu” for the “Theme locations” option.
Click “Save Menu”, the menu you have just created will now display on your theme.
Creating posts and categories
If you would like to have a blog on your website, you will need to do so by using “Posts”. If you would like to group your posts you will need to create categories.
Create a category
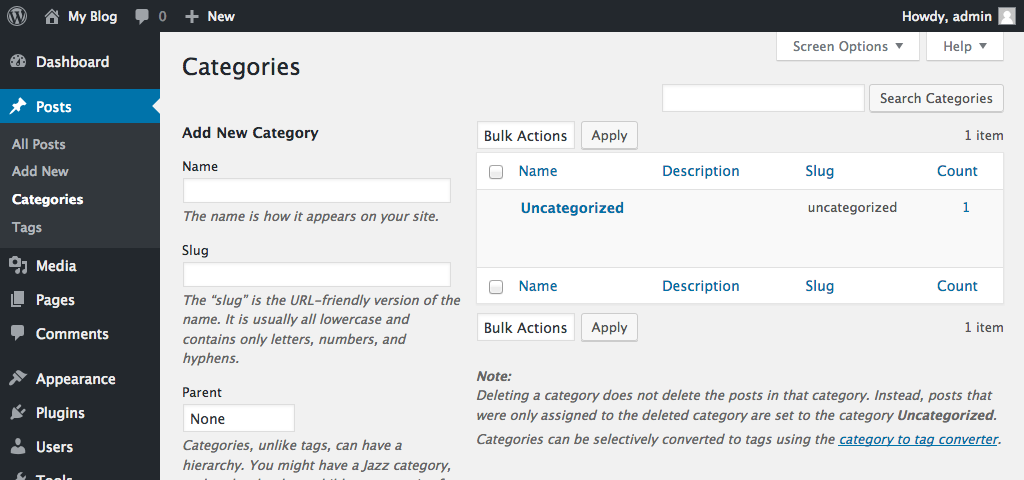
Hover over “Posts” found in the sidebar, click on “Categories”. Add a new category by filling in the “Name box” and then click “Add New Category”.
Creating a post
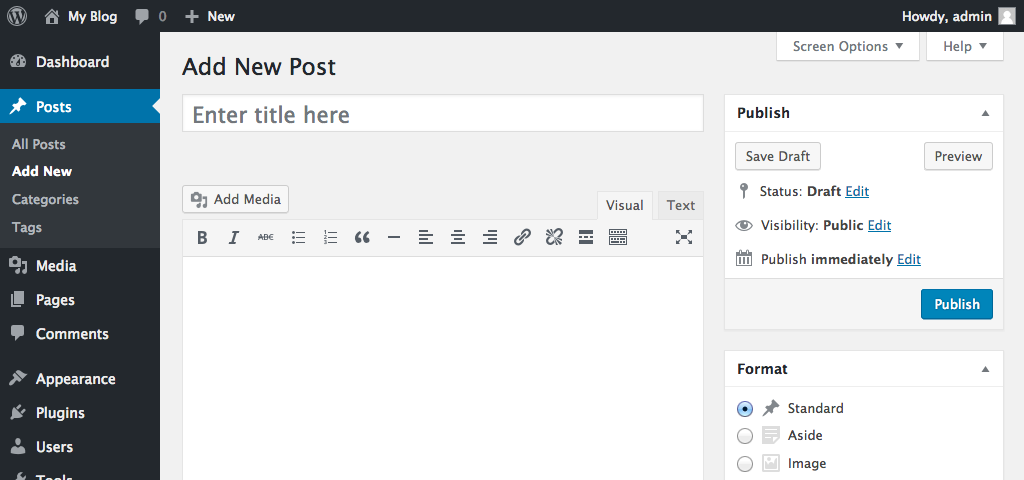
Click on “Posts” then “Add New”. You will see that adding a post is very similar to creating a page. Once you are happy with your post, on the right hand side click on the category you would like to add the post to and then click the “Publish” button.
Step #6: Installing WordPress plugins
Get more out of WordPress by installing plugins
Plugins extend the functionality or add new features to your WordPress websites.
What is a plugin?
Plugins offer custom features and functions so that you can get the most out of your website and tailor your website to your specific needs.
You can do anything with plugins. You can add photo galleries, forms as well as creating an online store. Plugins can even be used to optimise your website.
How to install a plugin
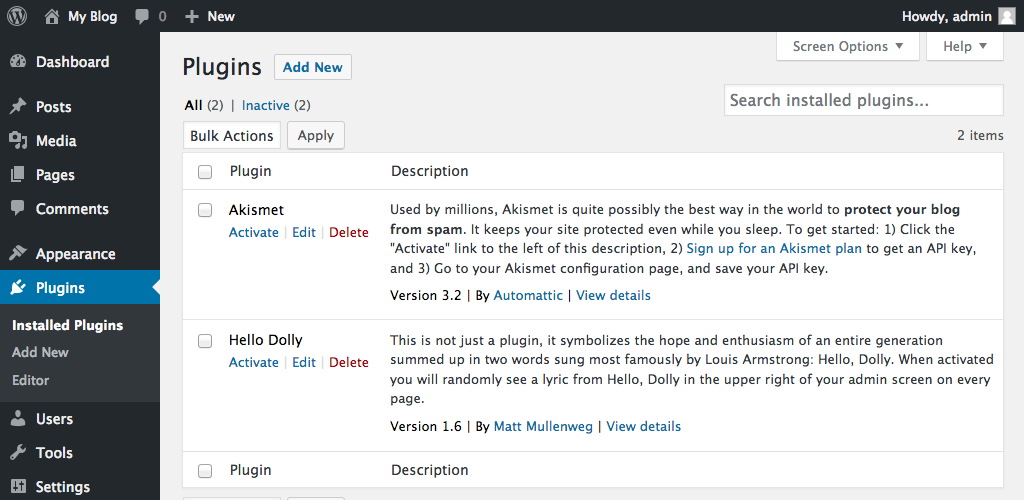
Installed plugins
Click on “Plugins”, found on the left of the Worpress dashboard. The plugins page will load and list all currently installed plugins.
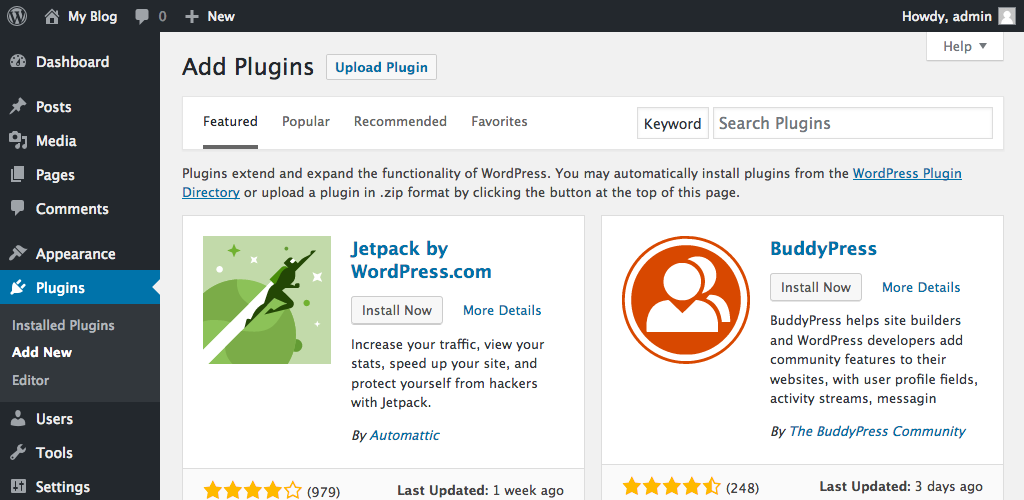
Adding Plugins
To add a new plugin click on “Add New” and start searching for a plugin that meets your requirements.
You can also click on “Recommended” this option will show useful plugins that will enhance your WordPress site… Don’t install every plugin you see though!
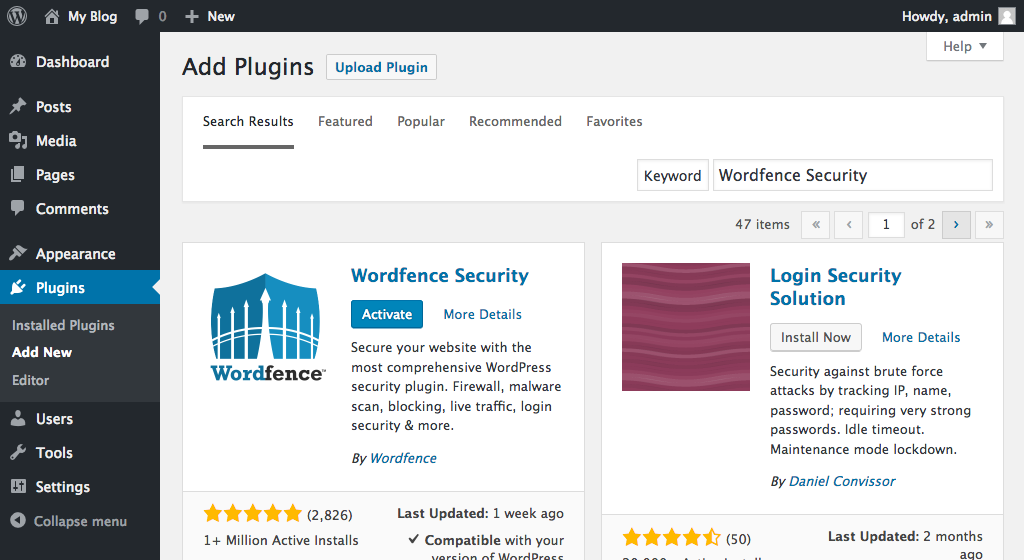
Once you have found one that you are happy with, we advise that you check it’s rating and reviews and when it was last updated, any plugin that has not been updated in the last 12 months should not be installed.
To install your plugin, click “Install” and then activate it.
We can highly recommend the below plugins and these should be installed on any WordPress site:
- Wordfence Security
- WP fail2ban
- Yoast SEO
- Contact Form 7
Step #7: Configure comments and sidebar widgets
Turn off comments on every new page by default
Default article settings
On the sidebar click on “Settings” then “Discussion” and untick the “Allow people to post comments on new articles” option.
Turn comments on or off on individual posts
Navigate to your post page
In your WordPress dashboard, click on “Posts” which is located on the left sidebar.
Quick edit post settings
Hover your mouse cursor over the posts you would like to edit click the “Quick Edit” that appears.
Allow or disable comments
Tick or untick the “Allow Comments” then click “Update”. Depending on what you selected comments will be allowed or disabled for that specific post.
How to customise sidebar widgets
Your WordPress theme will have a sidebar, this will either be found on the right or the left side of pages that you enable it on.
If you would like to add or remove some items that you do not need, follow the steps below:
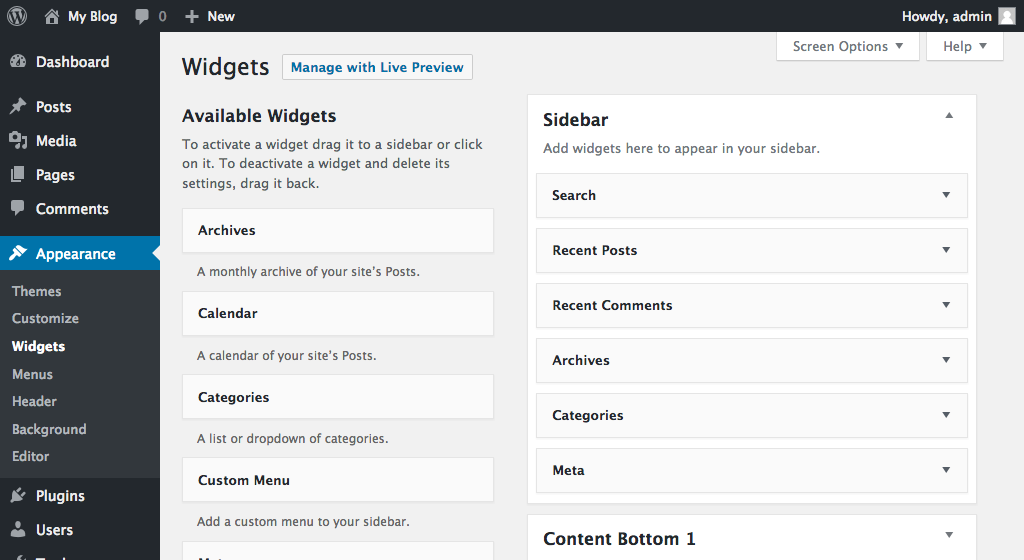
Navigate to available widgets
Click on “Appearance” then “Widgets”, found on the left of the WordPress dashboard. Once you are here you can remove the widgets within the sidebars you don’t need, by clicking on it to open, then “Delete”. You can also drag and drop different widgets/elements from the left side onto your sidebar.
Conclusion
We have covered a lot in this guide and this will give you a good start to making your site a success but by no means is this everything there is to learn about WordPress and web development, but you are well on your way.

